My Secret Weapon

WP_20160524_12_49_42_Pro
Life with a 3 year-old is hectic and, at times, exhausting….. But we gotta eat!
And, as long as I’m cooking, I want it to be delicious
.

While I haven’t had much time to experiment in the kitchen (or blog!), I always make a point of cooking for the week and getting a home -cooked dinner on the table on most nights.

But I don’t do it alone…  my trusty electric pressure cooker is my secret weapon! It’s safe, quick and easy to use. Pressure Cooker

As long as I have a protein (beef, chicken, pork, shrimp, tofu or even veggies) in my fridge (or freezer) and a few pantry staples – my favorite basics include oils, onions, garlic, ginger, frozen vegetables, canned whole tomatoes, tomato paste, beans, dried mushrooms, rice, anchovy paste (don’t knock it until you try it!), soy sauce, vinegars, chile pepper pastes and spices – I can make a substantive meal relatively quickly (and without needing to stand over the stove).

As an example, I’m including a recipe below but here are the basic steps you can use to make your own recipe:
1) Salt your protein
2) Set your pressure cooker on the “browning” setting and add oil
3) Sear your protein and set it aside
4) Add your aromatics, spices and tomato products (or as in the case below, curry paste)-  cook until much of the moisture is gone and color is turning brown
5) Deglaze with your liquid of choice (coconut milk, wine, beer, stock, vinegar or just plain water!)
6) After you’ve scraped up any brown bits from the bottom of the pot and the liquid has   started evaporating (but your pot still contains the minimum liquid required by your pressure cooker instructions), add your protein back to the pot and set your timer on the high pressure setting (follow your cooker’s instructions for how much time)
7) Once it’s finished cooking, taste and adjust seasoning and consistency.  If you’d like a thicker sauce, remove the protein and reduce the liquid on high heat, allowing water to evaporate and create a thicker consistency. If you’d like a thinner sauce, simply add liquid.

Try all kinds of different combinations that suit your palette and please share YOUR recipes!

Coconut Chicken Curry

Ingredients:

  • 1 Tbsp – Coconut Oil
  • 2.5 lbs – Chicken thighs (boneless and skinless)
  • 1 – Onion (sliced)
  • 2 – Bell pepper (1.5 sliced and .5 diced for garnish)
  • 2 cloves – Garlic (peeled and minced)
  • 1 tsp – Ginger (minced)
  • 2 Tbsp – Green Curry Paste
  • 1 Tbsp – Dried Shitake mushrooms (ground to powder in grinder dedicated to spices)
  • 1 tsp – Fish sauce
  • 1 Tbsp – Sugar
  • I can – Coconut Milk
  • 1 – Lime or Lemon to finish

Method:

  1. Salt chicken
  2. Set pressure cooker on “Browning” setting
  3. Add coconut oil and, when melted and super hot, sear chicken (in batches) until each side is browned
  4. Remove chicken and set aside
  5. Add each of these ingredients and stir until incorporated: onions, peppers, pinch of salt, ginger, garlic, curry paste, shitake powder, fish sauce and sugar
  6. Once the vegetables begin browning and much of the moisture has evaporated  (8 minutes), stir in the coconut milk (make sure you scrape up the brown bits from the bottom of the pot)
  7. Reintroduce the chicken, close your pressure cooker and, using the “High Pressure” setting, cook for the time indicated in your cooker instructions (on mine, 7 minutes)
  8. Once it’s cooked, taste and adjust seasonings/consistency
  9. Serve over rice with a squirt of lime or lemon, sprinkled with raw diced peppers (or any other raw veggie you like – it’s nice to have the fresh contrast) and chopped cilantro for color – if you have it on hand!

P.S. If you like things extra spicy, add more curry paste and fresh chiles, alongside the bell peppers.

Posted in Uncategorized | 2 Comments

How to Save $10


WP_20160524_12_17_43_Pro

Enough is enough!!

Yes, I love a good Açaí Bowl. But I’m tired of paying $10 (or more!) every time I get one. Going forward, I will make my own at home and you can too!

Here’s how:

  1. Purchase frozen açaí at Whole Foods and use a blender to puree it with fresh banana, frozen blueberries and a bit of kefir (cause why not get a little extra probiotic!)
  2. I top it with sliced bananas, toasted unsweetened coconut and crushed almonds
  3. Yum!

Here’s the actual recipe I used but you can make your own:

  • Vary your frozen fruit selection – try strawberries, peaches or even mango
  • Don’t like kefir? Try coconut water, milk (dairy or nut) or even just water
  • Add spinach to make it more nutritious
  • Garnish with anything YOU like!

My Açaí Bowl

Ingredients:

  • 50 g – Açaí (1/2 of the 100g packet it comes in)
  • 1 – Large Banana
  • 1/2 cup – Frozen Blueberries
  • 1.5 tsp – Kefir
  • Unsweetened coconut flakes (toasted)
  • Crushed almonds

Method:

  1. Blend açaí, 1/2 banana, frozen blueberries and kefir until fully pureed and incorporated yet still thick consistency
  2. Garnish with 1/2 banana (sliced), coconut flakes and almonds


Posted in Uncategorized | Leave a comment

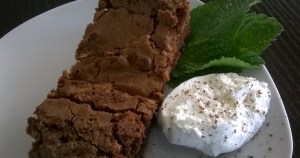
My Not-so-Secret-Anymore Brownie Recipe

Yes, this is the brownie recipe that you’ve been waiting for. Anyone who has tasted these Browniesdecadent goodies has asked… and until now, I have not been forthcoming. But I’m ready to divulge!

The secret to these messy, yet scrumptious, brownies is under baking them so that their interiors are soft and almost fudgy – yum….

I swirled half my batch with peanut butter. But wouldn’t dulce de leche be amazing too? Or how about marshmallow? Adding a bit of texture with chocolate chips, nuts, heath bar or M&Ms would be great. So many options… Now make your own recipe 🙂

The Most Decadent Brownie

Ingredients:

  • 4 sticks – Butter
  • 1 lb – Chocolate
  • 8 – Eggs
  • 4 cups – Sugar
  • 2 cups – Flour
  • 2 tsp – Baking powder

Method:

  1. Preheat oven to 350*
  2. Spray your largest baking pan with nonstick baking spray (Use a 17 x 13, if you have it. If not, use multiple smaller cake pans)
  3. Melt your chopped chocolate and diced butter in a dry stainless steel bowl placed over a pot of barely simmering water – use a bowl large enough to fit on top of the pot and only fill the pot about 1/4 of the way up so that the bowl doesn’t actually make contact with the water
  4. Stir it consistently with a rubber spatula and remove it from the heat before it’s completely melted to ensure that you don’t burn the chocolate. Once off the heat, continue stirring until smooth – allow to cool
  5. In a stand mixer, combine eggs and sugar – do not overmix
  6. Mix in your melted chocolate
  7. Add flour and baking powder and mix until just combined
  8. Pour mixture into pan and bake for approximately 50 minutes until the exterior has hardened but the interior is still slightly underbaked
  9. Cool pan on a wire rack and flip onto cutting surface
Posted in Uncategorized | Leave a comment

Cookies to the rescue!

Yup! We were having one of those days…. No school  and it was too hot to play outside. Toys were everywhere. I desperately neededSugar Cookies to create a fun project for my son. Cue the cookies 😃

Pair this simple, no-chill sugar cookie recipe with a rolling pin, cookie-cutters and sprinkles for hours of entertainment.

Make your own recipe:

  • Switch out flours – how about grinding almonds to replace half the flour for a tasty and healthful substitution?
  • Change the flavor – pure extracts such as lemon, hazelnut or any others you like can completely change the personality of your cookie
  • Add textures and flavors – how about chocolate chips? nuts? dried fruit? candy such as heath bars, peanut butter cups, marshmallows?

You get the idea… Now go make your own recipe!

SUGAR COOKIES

Ingredients

  • 4 oz. – unsalted butter
  • 3/4 cup – granulated sugar
  • 1  – egg
  • 1 tsp –  vanilla
  • 2 cups –  flour
  • 1  tsp – baking powder
  • 1/2  tsp – salt

Method

1) Preheat oven to 400 degrees and line a baking sheet with parchment paper
2) In a stand mixer (or large bowl), mix butter with sugar until light and fluffy
3) Add egg and vanilla
4) Separately, combine flour, baking powder, and salt
5) On a low setting, add dry mixture to butter mixture 1 cup at a time
6) Without chilling dough, divide into two portions
7)  On a floured surface, roll out dough until it it is approximately 1/8 inch thick
8) Dip your cookie cutters in flour and cut out cookie shapes (add sprinkles, if you like)
9) Bake on your prepared baking sheet for 8 minutes or until the edges of the cookies are set and beginning to lightly brown
10) Allow to cool and set on a wire rack

Posted in Uncategorized | 1 Comment

Pancakes, please!?!?!

The scene of the crime: vacation breakfast at a hotel. My son took one bite of the pancakesFluffy Whole Wheat Pancakes and pledged his love for this mythical food that had never been served at home. A pancake monster was born. Now what?

Not only did he now desire these fluffy pillows of goodness at home, but he wanted them on an average weekday when Mommy is getting ready for work and school…. Of course!

So, here’s what we did:

  1. We adapted this delicious Cook’s Illustrated recipe for Fluffy Whole Wheat Pancakes to make it a little healthier
  2. We cooked up huge batches and froze them in between parchment paper and stored them in Ziploc freezer bags
  3. We microwave individual pancakes on weekday mornings and adorn them with a bit of maple syrup and LOTS of berries (or other available fruit)

These tamed my monster! Try them on yours.

Fluffy Whole Wheat Pancakes *

Ingredients:

  • 2 cups – Whole-wheat flour
  • 2 cups – Ground flaxseed powder
  • 4 tbsp – Sugar
  • 3 tsp – Baking powder
  • 1 tsp – Baking soda
  • 1 tsp – Salt
  • 4 ½ cups – Buttermilk (lowfat)
  • 4 – Eggs
  • 5 tbsp + 1 tbsp – Coconut oil

Method:

  1. Combine dry ingredients in a large bowl
  2. Melt 5 tbsp of coconut oil in a microwave-safe bowl (set microwave to 30 seconds, check status and continue with another 30 seconds and so on until melted) and let cool slightly
  3. Combine wet ingredients in a separate bowl
  4. Make a well in the dry ingredients and add the wet ingredients (including the melted coconut oil) – mix well until it forms a batter
  5. Heat a large non-stick pan over medium-high heat and add your last tablespoon of coconut oil. Once it’s melted, wipe the pan with a paper towel and reserve
  6. Using a ¼ cup measuring spoon, dollop portions of batter into the pan
  7. Allow pancakes to cook on first side until edges are set, bubbles are beginning to show on the surface and it is golden brown. Flip pancakes and continue to cook until the second side is golden brown
  8. Transfer pancakes to a wire rack to cool
  9. Line pancakes in between parchment paper, store in a Ziploc bag and freeze

*Adapted from Cook’s Illustrated recipe

Posted in Uncategorized | 2 Comments

Stay “cool” with your hot broth :-)

I have officially jumped on the bone broth bandwagon!

No idea what I’m talking about? BrodoWell, you SHOULD know, that it’s become very au courant to sip bone broth out of a coffee cup. And while it might sound strange, I think you’ll find it to be a delicious and comforting snack. In addition to its flavor, experts are now claiming that the nutritional benefits derived from this long-simmering brew are enormous. In fact, this trend is so hot that Marco Canora (a well-known NYC restaurateur) has recently opened Brodo, an outpost of his restaurant (Hearth), focused on selling broth as a hot beverage.

With the help of my trusty pressure cooker to speed things up, I am really enjoying making my own. Recipes such as this one from the New York Times produce a super flavorful and hearty beef broth. However, you can make your own recipes and transform your basic broth into something really special. As a starting point, use the techniques shared in my Stocks section (with meat added to the simmer if you prefer broth over stock). Then just add seasoning and a few basic ingredients to customize to your taste. For example:

  • If you’re in the mood for a little savory overlay, simply simmer your broth with leftover Parmesan rinds. They’ll give your broth a depth of flavor you won’t believe.
  • Craving a bit more umami? Simmer your broth with dried porcini mushrooms. Just this one added ingredient will amp up the nutritional value of your broth and completely change the flavor profile.
  • Or feel like completely changing things up? Then how about sipping on a Thai-style broth? Just simmer your broth with garlic, ginger, lime, chile, fish sauce and coconut milk. You won’t believe how much it will taste like great Thai soups you’ve had in restaurants.

What other recipes might you make?

Posted in Uncategorized | 1 Comment

The Best Back-up Plan for Nourishing a Picky Eater

Dylan's MuffinsWhen my son was born, I had grand ideas about how I would soon feed him. As a cooking aficionado, I would expose him to the most delicious foods and help him develop the most sophisticated toddler’s palate.

Well, let’s just say, my grand plan is taking longer than anticipated to come to fruition… In fact, there are days when he eats such a limited diet that I worry he isn’t getting sufficient nutrition. Thankfully, I have created these muffins and he absolutely loves them! I continue to offer him wonderful food with the hope he’ll indulge. But in the meantime, these are my insurance policy 🙂

Yummy for my toddler but also tasty for an adult palate, these muffins are easy to make and pack a powerful nutritional punch. Feel free to use this technique to:

MAKE YOUR OWN RECIPE

  • Switch up the flour – what if you grind nuts or an alternative grain to make your flour?
  • Play with the flavoring – wouldn’t almond extract, nutmeg or even citrus zest be delicious?
  • Vary the fillings – how about pumpkin or beets instead of banana? and how about adding nuts, dried fruits or even fresh blueberries instead of the chocolate chips?

RECIPE FOR MY BABY’S MUFFINS

Ingredients:

  • 2 ½ cups – Rolled oats
  • 1 cup – Greek yogurt
  • 1 cup – Applesauce
  • ¾ cup – Maple syrup
  • 1/3 cup – Chia seeds
  • 3 cups – Rolled oats (to create oat flour)
  • ½ cup – Ground flaxseed
  • 6 – Bananas (very ripe and mashed)
  • 1/3 cup – Coconut oil
  • 1 tbsp – Vanilla extract
  • 4 tsp – Baking powder
  • 2 tsp – Baking soda
  • 2 tsp – Ground cinnamon
  • 1 tsp – Kosher salt
  • Semi-sweet chocolate chips (as much or as little as you like!)

 Method:

  • Preheat oven to 400*
  • Spray two mini-muffin pans with baking spray (or reuse the same one and bake in two batches)
  • Combine 2 ½ cups of rolled oats with yogurt and applesauce in a bowl and set aside
  • Combine maple syrup and chia seeds in a second bowl and set aside
  • Process 3 cups of rolled oats with ground flaxseed in a blender or food processor until finely ground into a flour
  • Add mashed bananas, coconut oil and vanilla to chia seed mixture and combine with oat/yogurt mixture
  • Combine oat flour, baking powder, baking soda, salt and cinnamon and mix into wet mixture
  • Fold in chocolate chips
  • Spoon into mini-muffin tins – only fill up to 2/3
  • Bake for approximately 16-20 minutes or until the muffin tops begin browning
  • Cool on a wire rack before removing
Posted in Uncategorized | 1 Comment

Are you making light?

This is the question I tend to ask myself around this time of year.Rainbow

At Chanukah, which begins on December 16, we celebrate how light – in all its forms – can triumph over any darkness.

Creating this light in every moment and every interaction is a choice. Whether it’s a meal for someone hungry, support for a friend in crisis or simply a smile and kind word for someone in need, making light is what it’s about.

Here are two of my favorite Chanukah recipes which will surely light up your family’s faces. My best wishes to all of you for a holiday season full of light!

CARAMELIZED ONION LATKES

Ingredients:

  • 4 – Medium russet potatoes, grated
  • 2 – Large vidalia onions, sliced
  • 3 – Eggs
  • 3 tsp – Kosher salt
  • ¼ tsp – Ground black pepper
  • 4 tsp – Baking powder
  • ½ cup – AP flour
  • 1 cup and 2 tbsp – Canola oil

Method:

  1. Preheat oven to 300* and line one baking sheet with paper towels and place a wire rack inside a second baking sheet
  2. Add 2 tbsp of canola oil and sliced onions (with a generous pinch of salt and pepper) to a large skillet over high heat. Once you hear a sizzle, lower the heat to medium-low and cook until onions are caramelized (soft, light brown and sweet). This could take up to 40 minutes – stir regularly and add a splash of water if onions begin to burn. Set onions aside in a large bowl and cool.
  3. Grate potatoes (I keep the skin on mine and grate in a food processor) – place grated potatoes in a clean dishtowel and squeeze out all the excess liquid
  4. In a bowl, combine the grated potatoes with the caramelized onions, eggs, baking powder, flour, salt and pepper
  5. Heat the remaining 1 cup of oil in the skillet over medium-high heat and when hot (test it by dropping in a bit of the latkes mixture – it should sizzle but not smoke) drop spoonfuls of the mixture into the oil and flatten with a spatula – flip after 2-3 minutes and cook for an additional 2-3 minutes on the other side to ensure a golden brown color on both sides. In between batches, remove any stray bits of potatoes from the pan as they will burn.
  6. Transfer cooked latkes to the paper towel-lined baking sheet to drain and then onto the second baking sheet with the wire rack and place it in the oven to keep these latkes warm while you finish cooking the rest
  7. Serve with sour cream or applesauce

RAINBOW COOKIES A LA CHANUKAH

Ingredients:

  • 2 1/2 sticks unsalted butter, softened
  • 1 cup sugar
  • 8 oz almond paste
  • 1 teaspoon almond extract
  • 4 large eggs
  • 2 cups all-purpose flour
  • 1/2 teaspoon salt
  • 12 drops blue food coloring
  • 12 oz apricot preserves, heated and strained
  • 12 oz high-quality semisweet or bittersweet chocolate, melted

Method:

  1. Preheat oven to 350F
  2. Butter three 9 X 13 baking sheet pans and line with parchment paper
  3. Beat almond paste in stand mixer until smooth
  4. Add butter and sugar and beat until fluffy
  5. Add almond extract and then eggs, one at a time
  6. Add flour and salt – only beat until combined
  7. Divide batter into thirds and place 1/3 in one bowl and 2/3 in a second bowl
  8. Add blue food coloring to one bowl
  9. Spread each 1/3 of batter into its own pan and bake each for approximately 10 minutes and cool on a wire rack
  10. Once cooled, place one of the blue cakes on a baking sheet lined with parchment paper
  11. Spread preserves on it and place the plain cake on top
  12. Spread preserves on plain cake and place the other blue cake on top
  13. Freeze for 1 hour to set jam
  14. Spread melted chocolate on top and on sides – chill for 30 minutes to set
  15. Flip cake onto another piece of parchment paper and spread chocolate on the other side – freeze for at least one hour
  16. While still frozen, slice cake into 1 ½ inch logs and slice logs into individual ½ inch cookies. Allow cookies to defrost before serving
Posted in Uncategorized | Leave a comment

Discovering My Culinary Roots

Simple, yet elegant, dignified and proud. Much like the vibe in her hometown of Strasbourg, this is how I remember my grandmother Greta.

Alsatian Tarte a L'Oignon

Alsatian Tarte a L’Oignon

Alsace-Lorraine, this very special region in eastern France (on the border of Germany), has been under French control since 1946. However, over the years, France and Germany have repeatedly alternated control over the region. The result of all this political turmoil is a very unique blending of the French and German cultures. Charming architecture reminiscent of Hansel and Gretel combines with French language and sensibilities.

Nowhere is this mélange more striking than in the food. Set against the backdrop of a beautiful wine country producing seven different grapes (Sylvaner, Pinot Blanc, Riesling, Muscat d’Alsace, Pinot Gris, Pinot Noir, Gewurtztraminer), Alsatian cuisine incorporates rich foods balanced by the unique flavors of its wines.

One of my favorite culinary discoveries was this hearty Tarte a l’Oignon, a filling mixture of bacon, onions, eggs and cream encased in a beautiful pie crust. Paired with a Riesling or Gewurtztraminer, this recipe perfectly exemplifies how simple ingredients can be elevated.

Enjoy this savory pie recipe with or without the bacon and remember that once you learn the basics of pie crusts here, you can make any pie you like – sweet or savory!

TARTE a L’OIGNON

Pie Crust

Ingredients:

  • 1 ½ cups AP flour
  • ¼ cup cold butter
  • ¼ cup shortening
  • ½ cup cold water

Method:

  1. Place flour on a cold work surface
  2. Cut cold butter and shortening into flour with a bench scraper
  3. Create a well in the center of the flour
  4. Gradually add cold water into the well and blend with the flour until it becomes a      dough and holds its shape
  5. Refrigerate in plastic wrap for 30 minutes
  6. Roll out dough on a floured surface to fit a 9 inch greased pie dish

Filling

Ingredients:

  • 6 slices bacon
  • 1 tbsp butter
  • 7 large onions, thinly sliced
  • 1 tbsp flour
  • 1 cup heavy cream
  • 4 eggs
  • Pinch of nutmeg
  • Salt and pepper to taste

Method:

  1. Preheat oven to 400* F
  2. Render bacon in a pan until crisp. Remove and drain on paper towels.
  3. Remove bacon fat and add butter
  4. Once melted, add onions, season with salt and pepper and cook for approximately      15 minutes until soft
  5. Off the heat, mix in flour, cream, bacon and nutmeg
  6. Add eggs one at a time and mix well in between
  7. Pour mixture into pie crust
  8. Bake for 40 minutes until top is browned


Posted in Uncategorized | 1 Comment

Light up!

Think about how you feel when you’re in a pitch dark room and suddenly you open a door Rainbowand allow in a sliver of light… Somehow this tiny bit of light has the miraculous ability to light up the room!

Bringing light – the literal and metaphorical kind – to this darkness is what the holiday of Chanukah is all about.

To help celebrate, I have recently started a tradition of making these Rainbow Cookies a la Chanukah. Colorful with a moist and rich almond interior, these cookies are intensified with a hint of acidic fruit and a touch of bitter chocolate. And in the spirit of Chanukah, they will surely “light up” the faces of your family and friends.

Enjoy the recipe and may you and your families bring much light from darkness!

Rainbow Cookies a la Chanukah

Ingredients:

  • 2 1/2 sticks unsalted butter, softened
  • 1 cup sugar
  • 8 oz almond paste
  • 1 teaspoon almond extract
  • 4 large eggs
  • 2 cups all-purpose flour
  • 1/2 teaspoon salt
  • 12 drops blue food coloring
  • 12 oz apricot preserves, heated and strained
  • 12 oz high-quality semisweet or bittersweet chocolate, melted

Method:

  1. Preheat oven to 350F
  2. Butter three 9 X 13 baking sheet pans and line with parchment paper
  3. Beat almond paste in stand mixer until smooth
  4. Add butter and sugar and beat until fluffy
  5. Add almond extract and then eggs, one at a time
  6. Add flour and salt – only beat until combined
  7. Divide batter into thirds and place 1/3 in one bowl and 2/3 in a second bowl
  8. Add blue food coloring to one bowl
  9. Spread each 1/3 of batter into its own pan and bake each for approximately 10 minutes and cool on a wire rack
  10. Once cooled, place one of the blue cakes on a baking sheet lined with parchment paper
  11. Spread preserves on it and place the plain cake on top
  12. Spread preserves on plain cake and place the other blue cake on top
  13. Freeze for 1 hour to set jam
  14. Spread melted chocolate on top and on sides – chill for 30 minutes to set
  15. Flip cake onto another piece of parchment paper and spread chocolate on the other side – freeze for at least one hour
  16. While still frozen, slice cake into 1 ½ inch logs and slice logs into individual ½ inch cookies. Allow cookies to defrost before serving
Posted in Uncategorized | 2 Comments